
Last updated on August 25th, 2026 at 12:02 pm
The engine computer manages ignition and fuel delivery for your 2006 Toyota Solara. Internal faults within this unit often trigger specific diagnostic codes. When this component malfunctions, you may experience drivability issues or failure to start. Proper replacement ensures your vehicle operates within designed parameters.
When your 2006 Toyota Solara exhibits persistent engine management issues, the central computer often becomes the primary suspect. Understanding the replacement process helps you prepare for the repair scope and necessary calibration steps. This guide outlines the physical access path and the critical programming requirements mandated by the manufacturer. You will learn the specific book times associated with removing and relearning the unit. Knowing these details allows you to verify shop estimates and ensure the work meets factory standards. Proper handling of this component prevents future compliance issues during state inspections. We focus on the factual procedures required to restore full functionality to your vehicle. Attention to the VIN writing procedure is essential for long-term operation.
This component serves as the brain for your 2006 Toyota Solara engine management system. It processes sensor data to control fuel injection and ignition timing accurately. Without proper function, the powertrain cannot operate efficiently or safely. Drivers often seek replacement engine computers for the Solara when internal processors fail. These units store vital data required for emissions compliance and engine performance. A malfunctioning controller may trigger warning lights or limit vehicle power. Understanding the role of this hardware clarifies why specific programming steps exist. The system relies on accurate vehicle identification numbers to function within legal limits. Replacement involves swapping the physical hardware and ensuring software compatibility. Your vehicle depends on this exchange for reliable daily transportation.
2006 Toyota Solara
OEM programmed ECM for your 2006 Toyota Solara — plug & play, no dealer visit.
Free shipping · Lifetime warranty
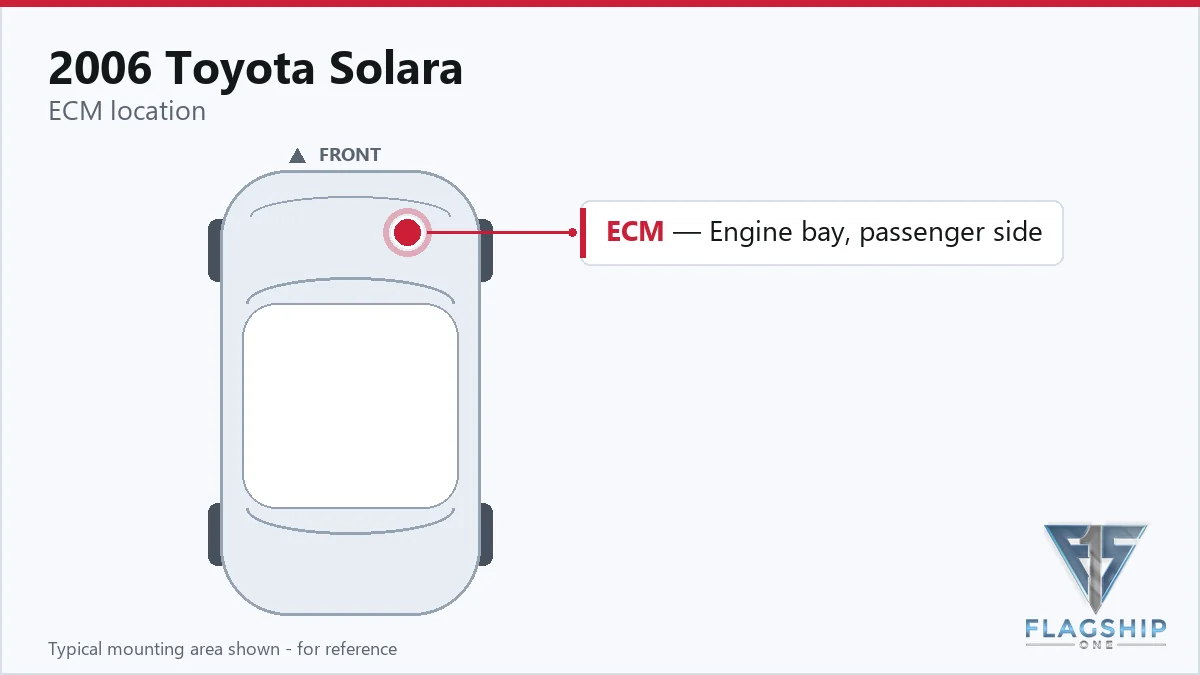
Factory procedures indicate the unit sits behind the right cowl trim panel. Gaining access requires removing several interior components before reaching the hardware. You must disconnect the battery negative terminal before starting work. The process involves taking out the right front door scuff panel. Technicians also remove the instrument panel number one under cover during this service. The lower finish component of the instrument panel comes off as well. Book time for removing and replacing the engine control module is 0.4 hours. Relearn procedures for the engine control module require 0.5 hours. Powertrain control module removal also lists at 0.4 hours. Relearn steps for the powertrain control module take 0.5 hours. These figures help estimate the total labor required for the job. Proper sequencing ensures no damage occurs to the surrounding trim pieces.
Work with the ignition off, and treat the module as static-sensitive: avoid touching the connector pins at any point.
| Operation | Configuration | Book Time |
|---|---|---|
| Engine Control Module Relearn | All configurations | 0.5 hr |
| Engine Control Module R&R | All configurations | 0.4 hr |
| Powertrain Control Module R&R | All configurations | 0.4 hr |
| Powertrain Control Module Relearn | All configurations | 0.5 hr |
The manufacturer requires writing the vehicle identification number to the module after installation. You must follow the diagnostic tester display instructions during this process. If the written number does not match, the procedure requires repeating the step. Vehicles with missing identification numbers may fail state emissions programs. A June 2005 update included models from 2004 and 2006 in this requirement. Step 4 now includes the Highlander HV in the VIN writing process. Flagship One simplifies this by providing a VIN-programmed replacement unit ready for installation. This approach eliminates the need for manual VIN entry at the shop. Ensuring the number is correct prevents inspection failures later. The factory caution emphasizes inputting the identification number on these units. Proper programming ensures the computer communicates correctly with other systems.
Symptoms of computer failure in your 2006 Toyota Solara often include unexpected stalling or no-start conditions. You might notice the engine running roughly or shifting poorly. Scan tools may lose communication with the engine management system entirely. Internal faults often trigger specific diagnostic trouble codes stored within the module. A common indicator is internal random access memory fault appearing on your scanner. These errors suggest the processor cannot retain data properly. Misfire codes may also appear alongside these internal hardware failures. Addressing these signs promptly prevents further damage to related components. Ignoring warning lights often leads to more complex drivability issues over time. Reliable operation depends on a functional control unit managing engine tasks.
The following list represents documented internal faults specific to this engine computer. These codes indicate hardware failures within the processing unit itself. Mechanics use these identifiers to confirm the need for replacement. Reviewing them helps diagnose whether the module is the root cause.
Factory documentation includes a caution note dated June 3, 2005 regarding programming procedures. This update expanded coverage to include models from 2004 and 2006. Step 4 now includes the Highlander HV in the VIN writing process. Operators must input the identification number on these units for compliance. Missing identification numbers subject the vehicle to failing emissions inspection programs. This information guides the correct software initialization process during service. Adhering to these updates prevents regulatory issues after repair work is finished.
Yes, factory procedures mandate writing the vehicle identification number to the new module. Failure to complete this step may cause emissions inspection failures. Flagship One units arrive with this step already completed.
Book time for removal and replacement is listed at 0.4 hours. Relearn procedures typically add 0.5 hours to the total labor estimate. Actual times may vary based on shop conditions.
The unit is positioned behind the cowl side trim panel. Access requires removing several interior components including the scuff plate. Technicians follow specific steps to reach the hardware safely.
Owners often weigh repairing the original unit against installing a refurbished replacement. Refurbished options typically offer a faster solution than troubleshooting internal circuit boards. For your 2006 Toyota Solara, a pre-programmed unit reduces shop time significantly. This choice minimizes the risk of programming errors during installation. Consider the labor savings when evaluating your total repair costs.

Flagship One stocks a refurbished, VIN-programmed PCM for the 2006 Toyota Solara with a lifetime warranty, free shipping and no core charge. The full Toyota Solara module lineup covers other engine configurations as well.
Restoring your 2006 Toyota Solara requires attention to both hardware and software details. Proper installation and programming ensure long-term reliability and emissions compliance. Review the labor times and access steps before beginning work. Contact Flagship One for compatible replacement options that meet factory standards.