
Last updated on August 25th, 2026 at 11:58 am
The powertrain control module in your 2014 Toyota RAV4 manages fuel delivery, ignition timing, and transmission shifts for the 2.5L engine. Internal processor faults or voltage spikes can corrupt its logic, leading to drivability issues or a no-start condition.
When your 2014 Toyota RAV4 develops a sudden no-start, stalling, or erratic shifting, the powertrain control module may be the cause. This computer governs fuel injection, spark timing, and transmission behavior for the 2.5L engine, so a failure can mimic many other problems. Understanding where the module lives, what the factory book time calls for, and which steps the dealer performs after installation helps you plan the repair with confidence. The following guide walks through the access path, labor estimates, the required post-install relearn, and the specific trouble code that points to an internal module fault. You will also learn the factory caution about battery disconnection and how a VIN-programmed replacement can simplify the job.
The powertrain control module in your 2014 Toyota RAV4 acts as the central processor for the 2.5L engine and automatic transmission, coordinating fuel injector pulse width, ignition coil timing, and shift solenoid operation based on sensor inputs. When this unit develops an internal fault, you may experience hard starting, unexpected stalls, harsh shifts, or a complete loss of communication with a scan tool. The module also stores adaptive values for idle quality and fuel trim, so a failure can erase learned corrections and leave the engine running poorly even if the hardware is sound. Because the processor handles both engine and transmission logic, a single fault can produce symptoms across multiple systems, making diagnosis tricky without a scan tool that reads module-specific codes. If testing confirms the module itself is at fault, sourcing replacement engine computers for the RAV4 that match your vehicle’s calibration ensures the adaptive strategy starts from a correct baseline. The factory design mounts the unit in the engine compartment where heat and vibration can stress solder joints over time, so a refurbished unit with updated components often provides longer service than a used alternative.
2014 Toyota RAV4 Powertrain
OEM programmed replacements — plug & play, no dealer visit.
Find yours by year, make & model →
Free shipping · Lifetime warranty
The factory service procedure locates the control module next to the air cleaner assembly in the engine compartment. To reach it, you disconnect the negative battery cable, remove the air cleaner cap sub-assembly, and then take off the air cleaner case. Book time for the module removal and installation is 0.8 hours, whether the job is listed under powertrain control module or engine control module R&R. After the physical swap, the factory calls for a relearn procedure that adds 0.5 hours for either the powertrain or engine control module relearn, and a separate 0.3-hour reset may also be specified. A critical factory caution states that after turning the ignition switch off, a waiting period may be required before you disconnect the cable from the battery terminal, so you must review that notice before starting work. The access path is straightforward but requires care with the intake components to avoid damaging sealing surfaces or sensor connectors. Once the module is exposed, the electrical connectors release with standard locking tabs, and the mounting hardware uses common metric fasteners.
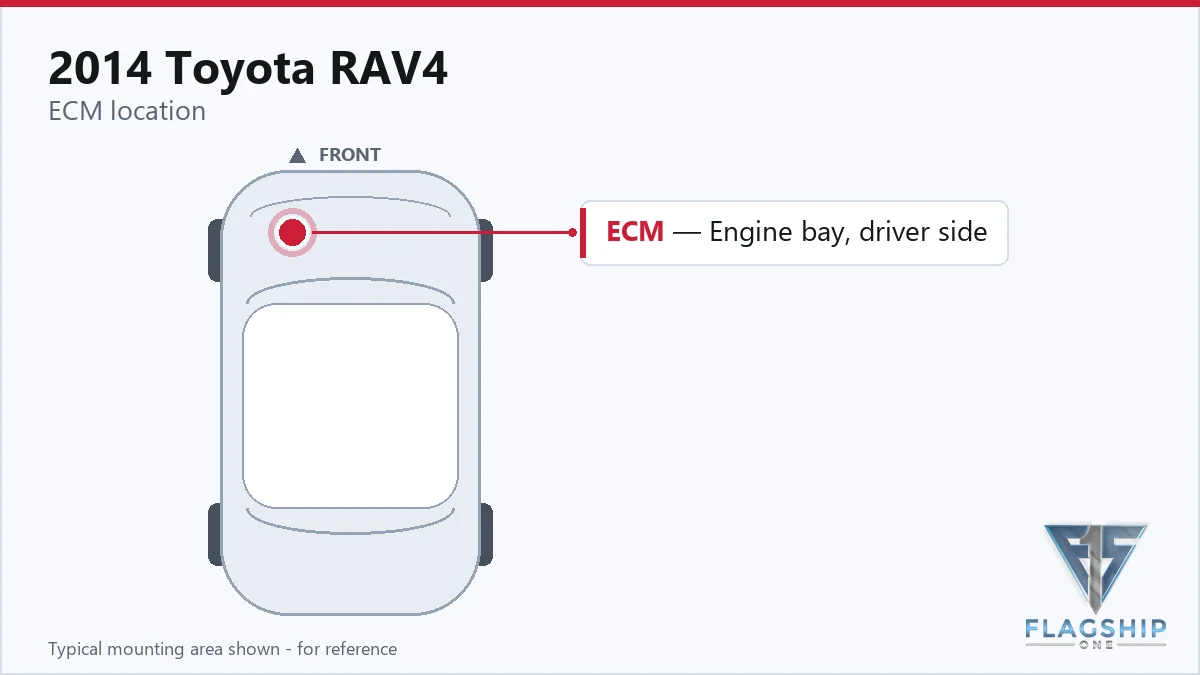
Work with the ignition off, and treat the module as static-sensitive: avoid touching the connector pins at any point.
| Operation | Configuration | Book Time |
|---|---|---|
| Powertrain Control Module R&R | All configurations | 0.8 hr |
| Powertrain Control Module Relearn | All configurations | 0.5 hr |
| Engine Control Module Relearn | All configurations | 0.5 hr |
| Engine Control Module R&R | All configurations | 0.8 hr |
| Engine Control Module Reset | All configurations | 0.3 hr |
After installing a new module, the factory procedure requires a relearn sequence that takes 0.5 hours for either the powertrain or engine control module, plus a possible 0.3-hour reset to clear adaptive values and re-establish communication with the immobilizer and transmission controllers. These steps ensure the module learns the current sensor baselines and syncs with the vehicle’s key codes. Flagship One eliminates this shop time because each unit ships as a VIN-programmed replacement unit already loaded with your vehicle’s specific calibration and key data, so the relearn and reset are effectively complete before the box arrives. You simply install the module, reconnect the battery, and the system is ready to operate without additional dealer-level tooling. This approach saves the 0.5 to 0.8 hours of programming labor that a blank module would demand and reduces the chance of a missed step that could leave a code set.
Common signs of a failing control module in your 2014 Toyota RAV4 include a crank-no-start condition, sudden engine stalls while driving, erratic or harsh transmission shifts, and a scan tool that cannot establish communication with the engine or powertrain computer. You may also notice the check engine light illuminated with codes that do not correspond to any sensor or actuator fault, or the engine may run roughly with fluctuating idle speed. In some cases, the vehicle enters a limp mode with reduced power and limited gear selection. A module-specific code such as processor performance fault P0606 points directly to an internal processor error rather than a wiring or sensor issue. Voltage spikes from a weak alternator or improper jump-starting can accelerate module degradation, so these symptoms often appear after electrical system stress. If multiple unrelated codes appear simultaneously or the module refuses to communicate, the probability of an internal module failure increases.
The following table lists the module-internal trouble code documented for the 2014 Toyota RAV4. This code originates inside the control module itself and indicates a processor-level fault rather than a sensor or circuit problem. When this code appears, the module’s internal self-test has detected a performance deviation that typically requires module replacement.
| Code | Meaning | Full Guide |
|---|---|---|
| P0606 | Module processor failure | Full P0606 guide → |
The factory labor guide lists 0.8 hours for the module removal and installation, plus an additional 0.5 hours for the required relearn procedure and up to 0.3 hours for a reset if specified.
The module mounts next to the air cleaner assembly; you access it by removing the negative battery cable, the air cleaner cap sub-assembly, and the air cleaner case.
A blank module would require the factory relearn and reset steps, but a VIN-programmed unit arrives with your vehicle’s calibration and key data already loaded, so no additional programming is needed.
When the powertrain control module in your 2014 Toyota RAV4 fails, you can choose between repairing the original unit or installing a refurbished replacement. Repair may be cost-effective if the fault is limited to a specific driver circuit, but internal processor errors like P0606 often indicate broader board-level damage. A refurbished module with updated components and a fresh calibration provides a clean baseline and typically includes a warranty. The straightforward access path and modest book time make either approach practical for a qualified shop or experienced DIYer.
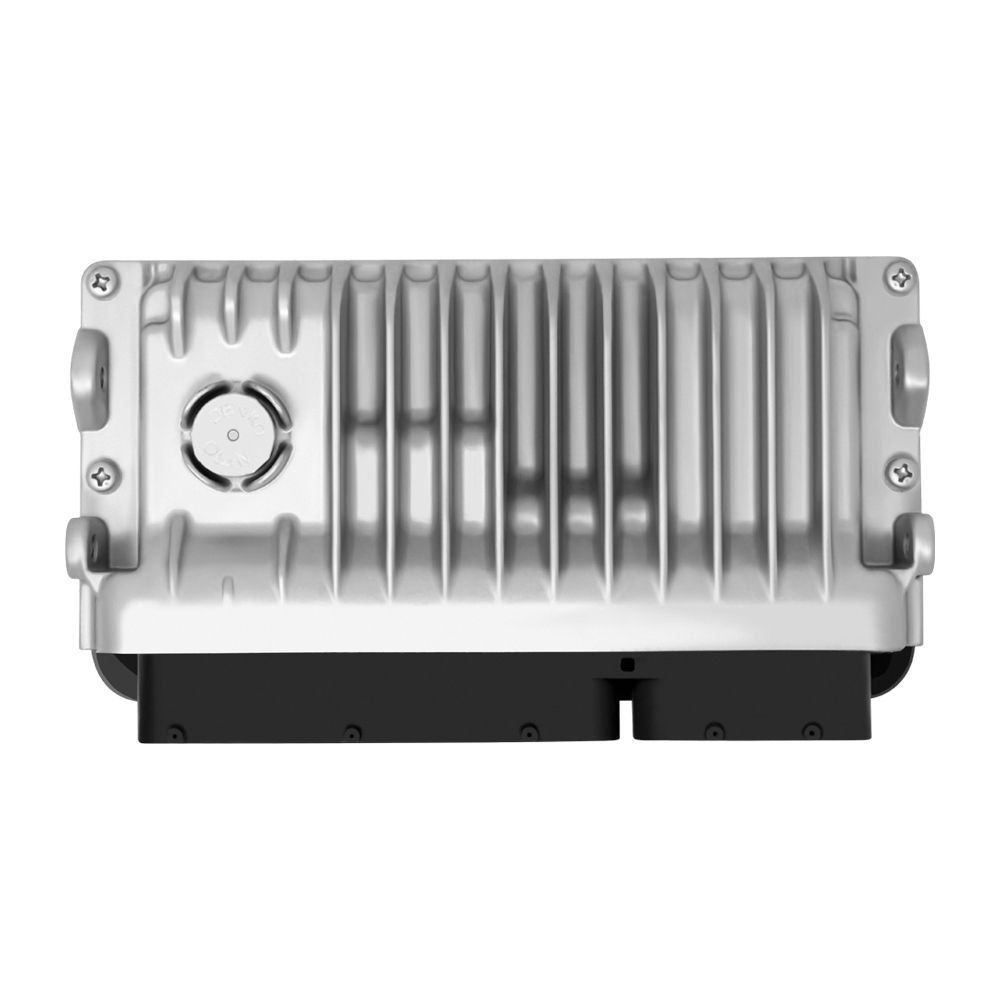
Flagship One stocks a refurbished, VIN-programmed PCM for the 2014 Toyota RAV4 with a lifetime warranty, free shipping and no core charge. The full Toyota RAV4 module lineup covers other engine configurations as well.
The 2014 Toyota RAV4 uses a combined powertrain and engine control module that is accessible with basic hand tools and a short labor window. Following the factory wait time before battery disconnection protects the module and other electronics during the swap. If diagnosis points to an internal fault, a VIN-programmed replacement eliminates the relearn steps and gets the vehicle back on the road quickly. Verify the code set and confirm the module is the root cause before committing to replacement.