Last updated on December 3rd, 2025 at 11:56 pm
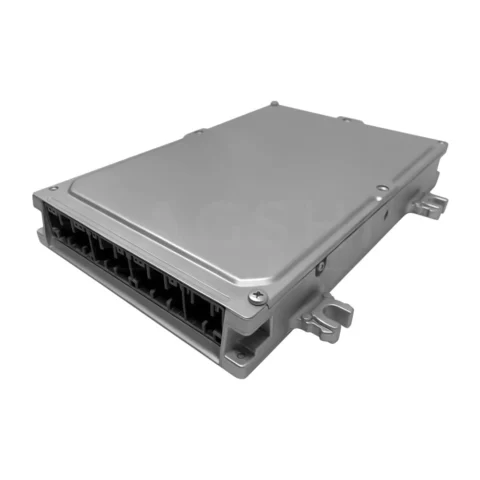
The Engine Control Unit (ECU), also known as the ECM (Engine Control Module), is a crucial component in modern vehicles, and this is especially true for the Acura Integra. This sophisticated piece of hardware is essentially the vehicle’s brain, regulating a multitude of functions ranging from fuel injection rates and air-intake, to emission control and timing. The ECU intricately monitors and adjusts these parameters to ensure optimal performance, fuel efficiency, and lower emissions.
Replacing an ECU can seem daunting, but with the right guidance and tools, it’s a manageable task. The process involves disconnecting the battery, locating and removing the old ECU, installing the new one, and reconnecting the battery. However, it’s crucial to remember that this is a simplified overview, and the actual process may vary slightly based on the specific model of the Acura Integra. Always refer to the vehicle’s service manual for comprehensive instructions, or seek professional assistance if needed.
Tools Needed
When replacing the ECU in an Acura Integra, you will need the following tools:
- Socket Wrench: This tool is essential for removing and installing bolts.
- Screwdriver Set: A variety of screwdrivers will be required to remove different screws.
- Pliers: Pliers may be needed to disconnect wiring harnesses.
- Voltage Meter: It is essential to ensure there is no power before starting to work on the ECU.
- Gloves: Always use gloves to protect your hands while working.
- Safety Goggles: It’s crucial to protect your eyes from any possible debris.
- Flashlight: A flashlight will help you see clearly in the dim light under the dashboard.
- ECU Puller: This is a specialized tool to safely remove the ECU from its slot.
Preparing Your Integra for ECU Replacement
Before starting the ECU replacement process, it’s important to properly prepare your Acura Integra. Here are the steps you need to follow:
- Park the Vehicle: Find a flat and stable surface to park your vehicle. An ideal location would be a garage or a shaded area to protect you from the elements while working on the vehicle.
- Disconnect the Battery: Disconnecting the battery is a crucial safety step. Always disconnect the negative terminal first to avoid any potential electrical shorts. To do this, use your socket wrench to loosen the bolt holding the cable on the terminal, and then pull the cable off. Repeat the process for the positive terminal.
- Wait for the Engine to Cool Down: If you’ve recently been driving your Acura Integra, allow some time for the engine to cool down before proceeding to ensure you don’t burn yourself on hot engine components.
By correctly preparing your vehicle, you facilitate a safer and smoother ECU replacement process. Remember, safety should always be your top priority when working on your vehicle.
Step-by-Step Replacement Guide
Follow these detailed steps to remove the old ECU and install the new one in your Acura Integra:
- Locate the ECU: The ECU of an Acura Integra is typically located beneath the dashboard on the passenger side. You might need to remove the glove box or other components to access it. Use your flashlight for better visibility.
- Disconnect the Wiring Harnesses: Once you’ve located the ECU, you’ll find several wiring harnesses connected to it. Carefully disconnect these using your pliers, taking care not to damage any of the wires. Remember to note down or take a picture of the wiring arrangement for reference when installing the new ECU.
- Remove the ECU: The ECU is secured with bolts or screws. Use your socket wrench or screwdriver to remove these. Once it’s loose, use your ECU puller to safely extract the ECU from its slot.
- Install the New ECU: Take your new ECU and carefully slide it into the slot. Ensure it fits perfectly without forcing it in. Secure it with the bolts or screws using your socket wrench or screwdriver.
- Reconnect the Wiring Harnesses: Refer to the picture or notes taken earlier and reconnect the wiring harnesses in the correct arrangement.
- Reconnect the Battery: Now that the new ECU is installed, you can reconnect the battery. First, connect the positive terminal and secure it with the bolt. Then, connect the negative terminal and secure it. Use your socket wrench for this process.
- Verify the Installation: Once everything is back in place, start your Acura Integra and observe. The Check Engine light should go out after a few seconds if the ECU is installed correctly and functioning as expected.
Remember to dispose of your old ECU properly, as it contains electronic components that may be harmful to the environment. Contact your local recycling center for guidance.
Always take proper safety measures, including using safety goggles and gloves, when working on your vehicle. If you find this task too challenging, consider getting professional help.
Post-Installation Steps
After successfully installing the new ECU into your Acura Integra, follow these steps to ensure everything works properly:
- Check Electrical Systems: With the battery reconnected, turn on the ignition without starting the engine. Verify that all your vehicle’s electrical systems – lights, radio, windows, etc. – are functioning correctly. This will help identify any potential wiring issues.
- Start the Vehicle: Next, start your Integra. The engine should start smoothly. If it doesn’t, recheck your installation and the placement of all wiring harnesses.
- Test Drive: Take your vehicle for a test drive. Pay attention to the vehicle’s performance. Any stuttering, stalling, or irregularities could indicate an issue with the new ECU.
- Scan for Error Codes: If your vehicle has an OBD-II scanner, use it to scan for any error codes. If any codes come up, it could mean that the ECU isn’t communicating properly with the other components of your vehicle.
- Monitor Performance: Over the next few days, monitor your vehicle’s performance. Look for any changes in fuel efficiency, emissions, or handling. These could all be signs that your ECU is working correctly and has optimized your engine’s parameters.
If you encounter any persistent issues after installing your new ECU, it’s recommended to consult a professional mechanic. Remember, the ECU is a vital part of your vehicle’s function, and problems with it can affect the overall performance and safety of your vehicle.
In conclusion, replacing the ECU in your Acura Integra involves several meticulous steps. Firstly, you must adequately prepare your working environment and ensure your vehicle is primed for the process. Post-installation, it’s imperative to verify the installation by checking the functionality of all electrical systems, starting the vehicle, taking it for a test drive, scanning for any error codes, and monitoring its performance over the next few days. Always prioritize safety and if in doubt, seek professional assistance. Replacing the ECU can optimize your vehicle’s operations and improve its overall performance.
DIAGNOSTIC TROUBLE CODES THAT RELATES TO THE PCM
Diagnostic Trouble Codes (DTCs) are codes that are stored by a vehicle’s on-board diagnostic (OBD) system when it detects a fault with the vehicle’s powertrain system.
P0100: Mass or Volume Air Flow Circuit Malfunction
P0101: Mass or Volume Air Flow Circuit Range/Performance
P0102: Mass or Volume Air Flow Circuit Low Input
P0103: Mass or Volume Air Flow Circuit High Input
P0110: Intake Air Temperature Circuit Malfunction
P0113: Intake Air Temperature Sensor 1 Circuit High
P0172: System Too Rich (Bank 1)
P0120: Throttle/Pedal Position Sensor/Switch “A” Circuit Malfunction
P0130: Oxygen Sensor Circuit Malfunction (Bank 1, Sensor 1)
P0131: Oxygen Sensor Circuit Range/Performance (Bank 1, Sensor 1)
P0132: Oxygen Sensor Circuit High Voltage (Bank 1, Sensor 1)
P0133: Oxygen Sensor Circuit Slow Response (Bank 1, Sensor 1)
P0134: Oxygen Sensor Circuit Intermittent (Bank 1, Sensor 1)
P0135: Oxygen Sensor Circuit Malfunction (Bank 1, Sensor 2)
P0136: Oxygen Sensor Circuit Range/Performance (Bank 1, Sensor 2)
P0137: Oxygen Sensor Circuit Low Voltage (Bank 1, Sensor 2)
P0138: Oxygen Sensor Circuit High Voltage (Bank 1, Sensor 2)
P0139: Oxygen Sensor Circuit Intermittent (Bank 1, Sensor 2)
P0140: Oxygen Sensor Circuit Malfunction (Bank 2, Sensor 1)
P0141: Oxygen Sensor Circuit Range/Performance (Bank 2, Sensor 1)
P0142: Oxygen Sensor Circuit Low Voltage (Bank 2, Sensor 1)
P0143: Oxygen Sensor Circuit High Voltage (Bank 2, Sensor 1)
P0144: Oxygen Sensor Circuit Intermittent (Bank 2, Sensor 1)
Here is a list of some diagnostic trouble codes (DTCs) that begin with the letter “U” and could potentially indicate a fault with the powertrain control module (PCM) in a vehicle:
U0100: Lost Communication with Engine Control Module/Powertrain Control Module
U0101: Lost Communication with Transmission Control Module
U0102: Lost Communication with Transfer Case Control Module
U0103: Lost Communication with Throttle Actuator Control Motor Circuit
U0104: Lost Communication with Throttle Actuator Control Motor Circuit Range/Performance
U0105: Lost Communication with Throttle Actuator Control Motor Circuit Low
U0106: Lost Communication with Throttle Actuator Control Motor Circuit High
U0107: Lost Communication with Throttle Actuator Control Motor Circuit Intermittent
U0108: Lost Communication with Throttle Actuator Control Motor Circuit Open
U0109: Lost Communication with Throttle Actuator Control Motor Circuit Short to Ground
U0110: Lost Communication with Throttle Actuator Control Motor Circuit Short to Battery
U0111: Lost Communication with Throttle Actuator Control Motor Circuit Short to Power
U0112: Lost Communication with Throttle Actuator Control Motor Circuit Short to Ground
U0113: Lost Communication with Throttle Actuator Control Motor Circuit Short to Battery
U0114: Lost Communication with Throttle Actuator Control Motor Circuit Short to Power
U0115: Lost Communication with Throttle Actuator Control Motor Circuit Failure
U0116: Lost Communication with Throttle Actuator Control Motor Circuit Range/Performance
Note: These codes are just a small sample and there are many other DTC codes that could potentially indicate a fault with the PCM. Additionally, the specific codes that are relevant will depend on the make and model of the vehicle. It is important to consult the vehicle’s service manual or a professional mechanic for more information about interpreting DTC codes.